Mechanisms
Outlined below are some basic base and lift types often seen in VEX Robotics Competitions. We hope this helps you get some ideas on how to construct your robot!
Base Types
The base of your robot is the most important part of your robot that needs to be working during a match. You can’t play the game if you are unable to drive around properly!
Before learning about the common types of bases, here are some basic rules to follow while building your base:
Always support an axle at two separate points. Supporting an axle only on one side will greatly decrease stability
If you must use steel parts rather than aluminum, use it to construct your base rather than a lift or other system
For the VEX V5 system, 4 motors your drive base is usually ideal. 2 can oftentimes be insufficient while 6 can be difficult to pull off with all the other things you may want to put on your robot
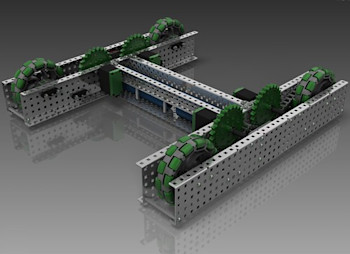
Grip Wheel Drive
The grip wheel drive is made by using 4 standard grip wheels as shown below:

Pros
The additional grip allows the robot to move slightly faster
Very difficult for other robots to push it from the side
Cons
Turning and maneuvering with the robot is made much slower and more difficult
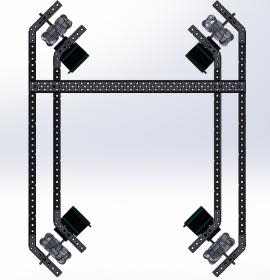
Omni Wheel Drive
The omnidirectional drive is constructed with 4 omni wheels as shown below:
Pros
Turning and maneuvering with the robot is extremely fast and easy
Cons
The robot will be able to be easily pushed from the side by other robots
Holonomic (or X) Drive
A holonomic drive is made by offsetting 4 omni wheels by 90 degrees to create a sort of X formation:
Pros
This base can be programmed to move in any direction. Forward, back, left, right, and diagonal
Cons
Offsetting the wheels takes up additional space
The robot can still be pushed from the side
Mecanum Drive
A mecanum drive is constructed using 4 mecanum wheels as shown here:
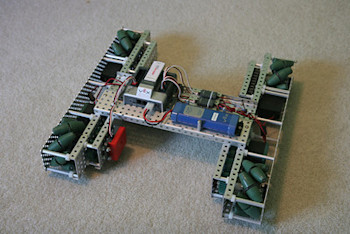
Pros
Has the ability to move in all directions like the X drive
Hard to push the robot from the side
Cons
The wheels are very large and take up quite a bit of space
Lift Types
In past VEX Robotics Competitions, there is often a part of the game which involves lifting various objects. Here, you can learn about the common types of lifts used within VEX Robotics.
Before starting your lift, here are some rules that you should follow:
Whenever possible, use a screw joint rather than simply using an axle. This applies to all other parts of your robot besides your lift
Connect both sides of your lift to the motor(s) powering it
You will probably need to use rubber bands on your lift. This helps the lift raise more efficiently and takes stress off the motor
4 Bar Lift
The 4 bar lift is incredibly simple as it only requires 4 bars per side. This can be used to lift game objects a short distance from the ground.
Pros
Simple and easy to construct
LIghtweight and can be very compact
Cons
Does not lift very high for the size limit on VEX robots
Does not lift linearly
The bars at the top of the lift will not stay in the same position as they rise. They will move out and then in again.
6 Bar Lift
The 6 bar lift is an extension of the 4 bar lift which gives it additional height. It requires 6 bars per side to construct. Note that you can continue to extend this lift into an 8 bar, 12 bar, etc. for additional height.
Pros
Pretty much just as simple as a 4 bar lift but with additional height
Cons
Like the 4 bar, this lift does not raise linearly
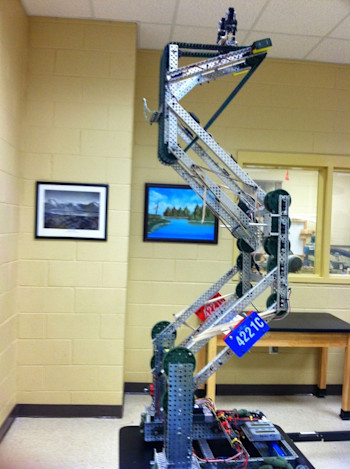
Chain Bar Lift
Like the lifts previously discussed, this lift keeps the bars attached to the top perpendicular to the ground. But instead of using several parallel bars to achieve this, it uses a chain and sprocket.
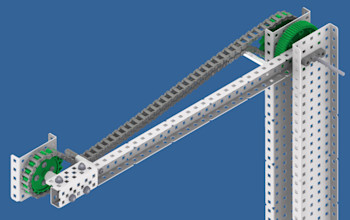
Pros
Not needing extra bars can make this design slightly more compact than other lifts
Cons
If the chain snaps, the lift will no longer function properly
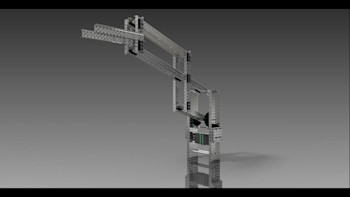
Double Reverse 4 Bar
This is one of the most commonly used lifts in VEX Robotics. It is essentially just two 4 bars linked together via gears. Note that you can make any of the 4 bars on this lift into 6 bars for even more height
Pros
Can be very tall
Generally a very fast lift type
Lifts linearly unlike the previously discussed lifts
Cons
The spacing can be difficult to get right the first time
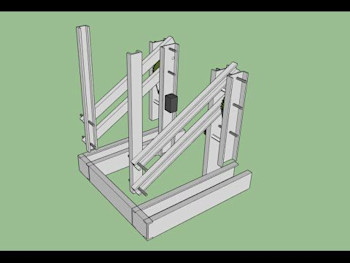
Scissor Lift
The scissor lift is a lift type often seen outside of the VEX world. It uses a series of X formations and drives the base of the X formations closer together to make the lift rise.
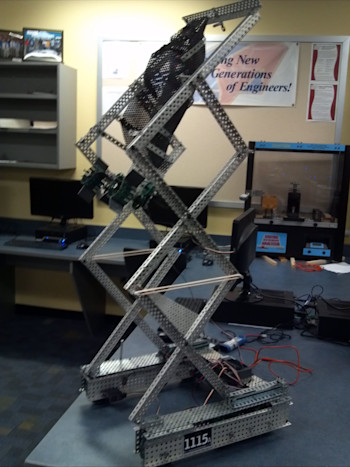
Pros
Can be very tall
Sides are fairly compact and leave lots of space in the middle of the robot for other systems
Cons
This lift type is often somewhat slow compared to others.
Cascade Lift
A cascade lift uses linear slides to move separate stages of the lift straight up
Pros
Can be extremely compact
Cons
Generally not too fast
If the chain breaks, the lift will no longer work properly
Very difficult to build